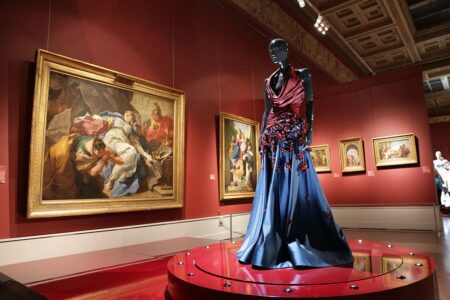
When it comes to product photography, the ‘ghost mannequin effect’ is a popular technique used to make clothing items look more lifelike and three-dimensional. If you’re looking to create this effect for your own product photos, here’s a quick guide on how to do it.
Introduction: What is the ‘ghost mannequin effect’?
The ‘ghost mannequin effect’ is a popular editing technique used to create a floating mannequin effect in product photography. It’s a great way to make your product photos more eye-catching and professional. Here’s a step-by-step guide on how to create a ‘ghost mannequin effect’:
Start by shooting your product on a white background. This will make it easier to edit later on.
Next, take a photo of the front and back of the product. Make sure the product is centred in the frame and there is some space around it.
Now it’s time to edit! In Photoshop, open up the two images you took in Step 1 and
Select the front image and use the Clone Stamp tool to clone over the neck area. Be sure to match the texture and lighting as best as you can.
Once you’re happy with the result, do the same for the back image. Again, be sure to match the texture and lighting as best as you can.
Now you should have two images that look like floating mannequins! To bring them together, select both images and go to Edit > Auto-Align Layers. This will ensure that both images are perfectly aligned.
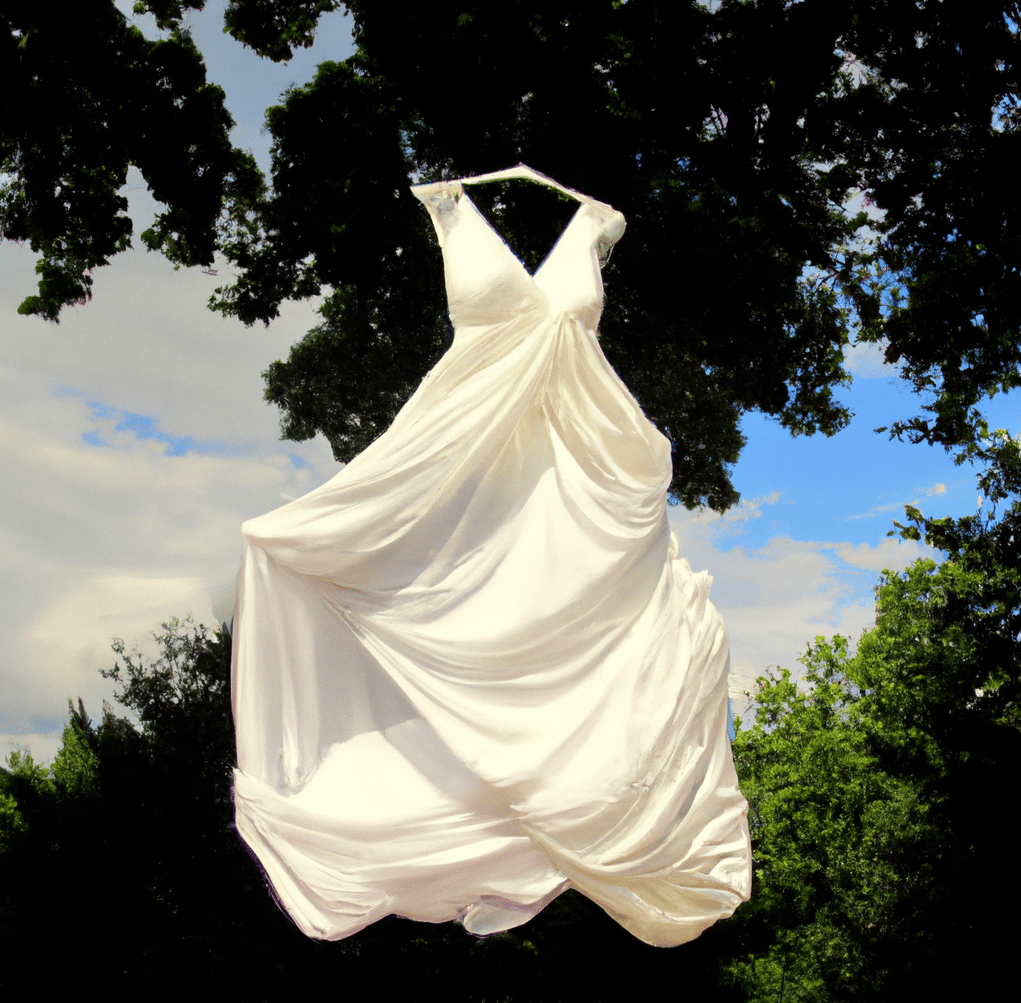
Finally, go to Edit > Auto-Blend Layers and select ‘Stack Images’. This will blend both images together and create a realistic ghost mannequin effect!
Step 1: Choose the right clothing items
If you want to create a ‘ghost mannequin’ effect in your photos, there are a few things you need to do. First, choose the right clothing items. You’ll need a shirt or dress that is form-fitting and doesn’t have a lot of extra fabric. Avoid anything with ruffles or pleats. Second, find a mannequin that is the same size as you or slightly larger. You don’t want the clothing to be too loose or it will look sloppy. Third, position the mannequin so that it is facing away from the camera and place the clothing on it. Make sure that the seams are lined up and that there are no wrinkles. Fourth, take the photo from above so that you can see the ‘ghost mannequin’ effect. And that’s it!
Step 2: Set up your mannequin
If you’re looking to create a ‘ghost mannequin’ effect in your own product photography, here’s a quick and easy guide to get you started.
Begin by setting up your mannequin in the desired pose. If you’re not using a live model, you’ll need to make sure the mannequin is securely fastened to its stand.
Once your mannequin is in place, take a few practice shots to get the lighting and composition just right.
When you’re happy with the setup, it’s time to start taking your ‘ghost mannequin’ shots. To do this, simply take a photo of the front and back of the mannequin separately.
In post-processing, use your software of choice to composite the two images together. This will create the illusion that the mannequin is floating in mid-air.
With a little practice, you’ll be able to create professional-looking ‘ghost mannequin’ shots that are sure to impress your clients or customers.
Step 3: Take your photos
Step One: Take your photos
With a little bit of creativity and the right tools, you can create a ghost mannequin effect that makes your product photos look more professional and polished. All you need is a digital camera, a tripod, and a few well-placed pieces of tape.
Step Two: Set up your camera
To get started, set up your camera on a tripod and position it so that it’s pointing straight at the center of the mannequin. If you’re using a DSLR, set your camera to manual mode and adjust the shutter speed, aperture, and ISO to get a well-exposed image.
Step Three: Tape off the mannequin
Once your camera is in place, it’s time to start taping off the mannequin. You’ll want to use painters tape or masking tape so that it doesn’t leave any residue on the mannequin or clothing. Start by taping off the arms, legs, and neck of the mannequin. Then, tape around the edge of the mannequin where it meets the background.
Step 4: Edit your photos
If you want to know how to create a ‘ghost mannequin effect’ in your photos, then this is the guide for you. This effect is often used in fashion photography to make the clothes look like they’re floating on the body. It’s a really cool effect and it’s not as hard as you might think to create.
Here’s what you need to do:
Find a mannequin or dress form that you can use. If you don’t have one, you can try using a friend or family member as your model. Just make sure they are okay with being photographed in their underwear!
Take a photo of the mannequin or dress form from the front, back, and sides. Make sure to get close enough so that the clothes fill up most of the frame.
Edit the photos in Photoshop or another photo editing program. You’ll need to cut out the mannequin or dress form from each photo and then paste it into a new layer.
Once you have all of the layers cut out, you can start playing around with the opacity levels to create the ghost mannequin effect. Experiment until you get the look that you want.
Step 5: Create your ghost mannequin effect
Ever wonder how those perfectly posed mannequins in store windows always look so good? Well, a lot of the time it’s thanks to the ‘ghost mannequin’ effect! This technique is used to make sure the clothes look their best, without any wrinkles or creases.
So, how do you create a ‘ghost mannequin’ effect? Well, it’s actually pretty simple. First, you’ll need to find a mannequin that’s the right size for the clothing you want to photograph. Next, dress the mannequin in the clothing and position it how you want it to look in the final photo.
Once the mannequin is dressed and in position, it’s time to take your photo. You’ll need to use a tripod so that the camera is level with the mannequin. Then, take a photo of the front of the mannequin and another from the back.
Finally, you’ll need to edit your photos in Photoshop or another editing program. First, you’ll need to delete the mannequin from both photos. Next, you’ll need to line up the two photos so that the clothing looks like it’s floating in mid-air. And that’s it! Now you know how to create a ‘ghost mannequin’ effect!